


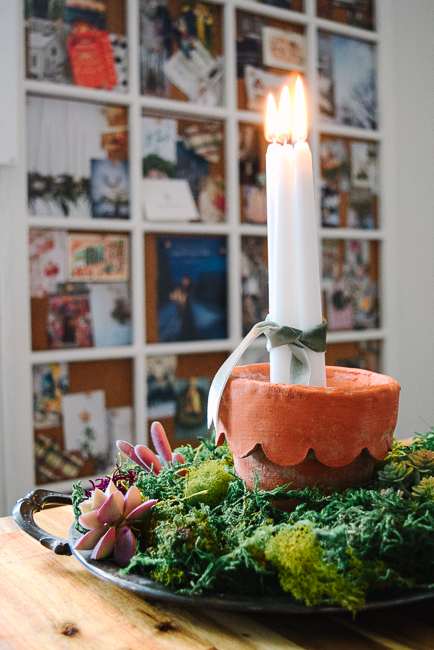
I’m always ready for spring. About a week after New Year’s Day, I’m over winter. I want sunshine and flowers and leaves back on the trees. To prep for what will surely be a small haul of plants in the next month, I made this adorable scallop edge terracotta pot!
Maybe there’s some things as a girl you never stop loving. For me, gingham, scallop edges, and twine bows are it. I’m also a big fan of terracotta. The color, the texture- it’s all beautiful. This simple gardening DIY is the perfect marriage of two of my favorites.
This is also one of those great quickie crafts. Most of the supplies will be things you’ve already got and it only takes about half an hour to make a couple of scallop edge terracotta pots. And, if you’ve got older kids, I think you could even have them help out.
Supplies To Make A Scallop Edge Terracotta Pot
Terracotta flower pots
DAS Air Dry Clay
Aleene's Tacky Glue (the greatest of all the glues)
Flower Cookie Cutter
Pair of scissors
Rolling pin
Metal edged ruler
Small cup of water
Measuring tape
If you need to repaint your pots (or just want to), you’ll also need paint, a paintbrush, and some flour if you’d like an aged look.
Instructions To Craft Your Scallop Edge Terracotta Pot
1. PREP YOUR WORK STATION.
Unless you’re doing a huge pot, you won’t need a lot of room. Make sure you’ve cleaned this surface, and that it’s one that won’t stain!
Lay out all of your supplies including a hunk of clay.
Measure the top rim (where your scallop edge will attach) of your flower pot. Then lay out that much measuring tape so you can make sure you make your edge that long.
2. MAKE YOUR SCALLOP EDGE CUTTER.
Your flower cookie cutter is essentially one big scalloped line made into a circle. Once you cut it, you’ll have a perfect scallop edge cookie cutter!
Most cookie cutters are made with aluminum, which is a very flimsy metal. You can use a regular pair of scissors (not your best ones) to cut the inner fold of the flower. Using just a little bit of force (you don’t want to lose the scallop edge) form your cookie cutter into a line.
Quick note: I bought a set of flower cookie cutters from Amazon. They were easy to cut, and each flower has different sized petals so I can make larger or smaller scalloped edges!
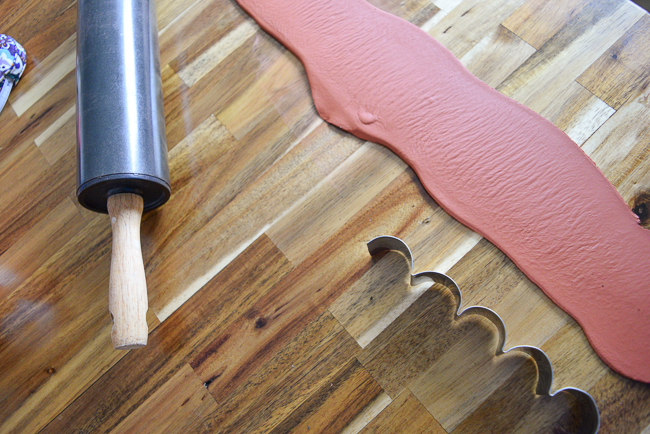
3. ROLL OUT YOUR CLAY.
Playing with clay is always fun and messy! I was very glad I grabbed an apron!
Quick note: The terracotta colored paperclay will dry almost exactly the same color as a traditional flower pot. However, it is messy and stains before it dries. Be aware! Or, if you’re going to paint your flower pot, you can opt for their white clay instead.
To get your clay softened, roll it around and squish it between your fingers for a minute or two. Then roll it into a large ball. Now, you can roll it out like a long, thick worm. Once your clay roll is a little longer than the trim size you measured earlier, you can roll it flat with your rolling pin.
Aim for about a quarter inch thick slab of clay to work with.
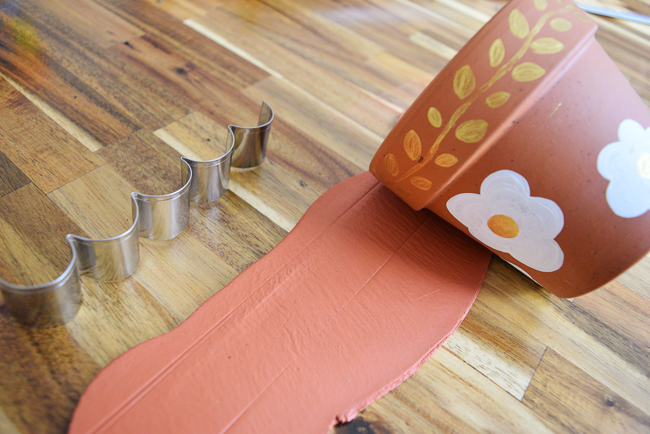
4. CUT YOUR SCALLOP EDGE TRIM.
Gently roll your flower pot edge (as straight as possible) along your clay slab. You only need to do it enough to see indentions. This will help guide you to know where to cut.
From the bottom indention, line up the upper part of your scallop edge cookie cutter and cut the length you need. I needed to make several cuts in a row. Line them up so it looks like a perfect pattern.
Measure about a quarter inch above the top indention. Use your metal edge ruler to cut a straight line along the top. Double check the length around your flower pot, and again use your ruler to cut the edges.
Peel away the scrap clay leaving a perfect scallop edge trim: straight on the top and sides and scalloped on the bottom.
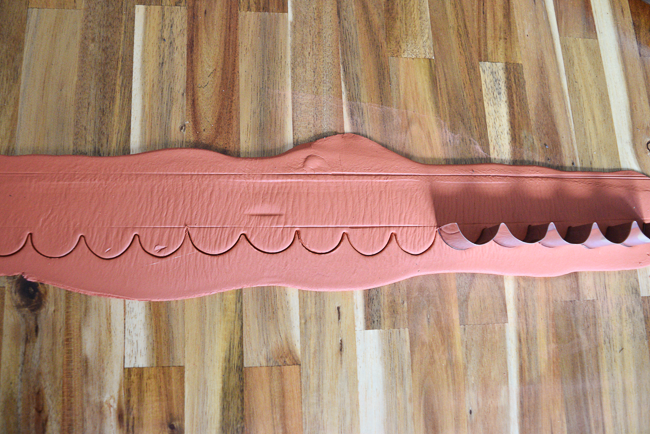
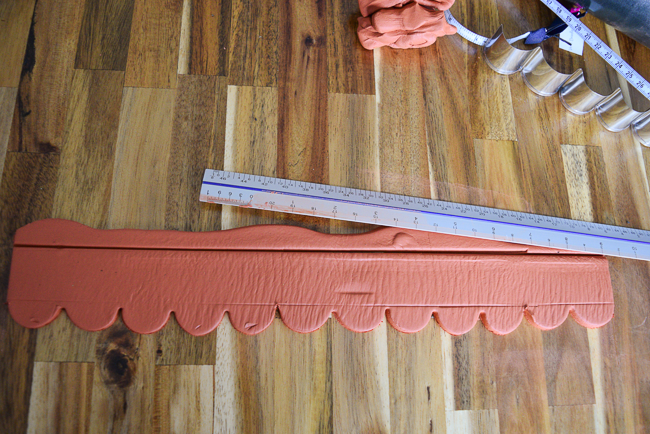
5. Add the Glue.
Gently pull up your trim from the surface you rolled it out on. This is just to keep it easy to attach in a minute.
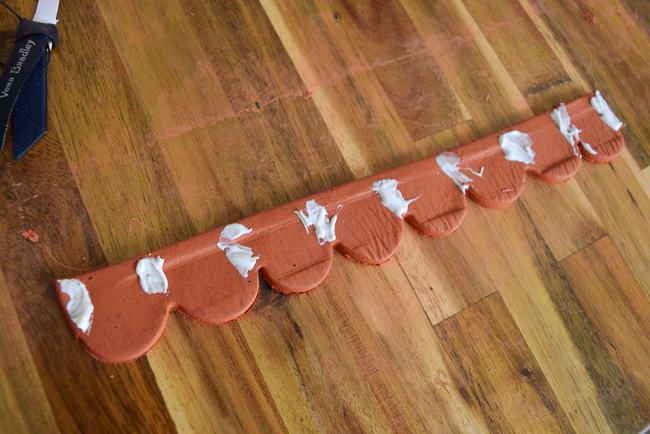
Lay it gently back on your work surface.Put vertical swipes of Aleene’s tacky glue every inch or so along the trim. Make sure to get both edges well-covered.
Now line your pot up with your trim. You want that extra quarter inch to hang over the top. Gently roll your pot along the trim, helping as needed to attach them together.
6. PERFECT YOUR FLOWER POT.
The best part about clay is that it’s so malleable. With the tiniest bit of water you can make it do anything you want!
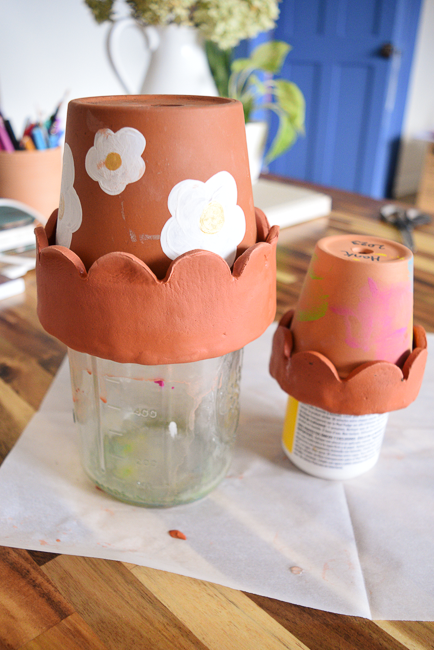
The first thing to do is take that top bit of overhang and push it down over the top edge of the pot going inward. Smooth it all the way flat onto the inside rim of the pot.
Quick note: If you’re having trouble with your trim sliding down, put your pots upside down onto a larger cup. I ended up needing to do this with one and then did it with the other because it worked so well. You can smooth the clay but crouching below so you can see it.
After you have the top rim done, it’s time to smooth it all out. Dip a finger or two into your cup of water and then slide it along your top rim and scallop edge seam to smooth out any wrinkles or lines. You can get as perfectionist as you’d like. Personally, I think a big of wobble looks good and homey, but you do you!
7. LET IT DRY!
Air dry clay can take anywhere from 8-24 hours to dry, so go enjoy yourself. Your scallop edge flower pot will be ready for you tomorrow. You can let it dry right side up or upside down,whichever is working best for your pot.
8. PAINT YOUR FLOWER POT. (OPTIONAL)
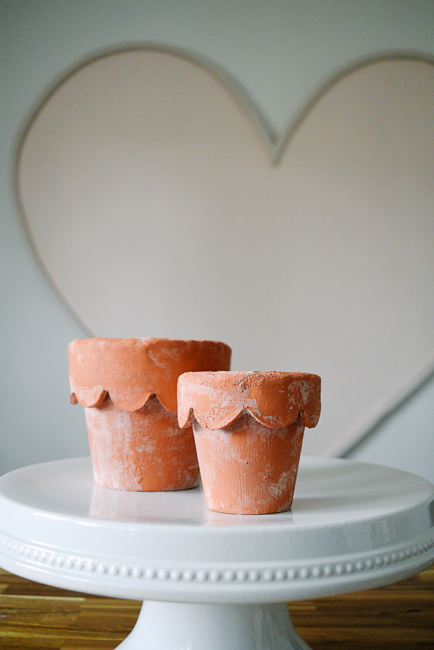
If you used old craft project flower pots like me or you just want to give yours a French-aged look, paint your pot after everything is dry and secure.
Use a heavy coat of acrylic paint and when it’s semi-dry dust a little flour on it. Brush and blow the flour off irregularly. Let dry again, and you’re all done!
Leave a Reply
read the Most popular posts...


Magical DIY Tangled Lantern Christmas Tree
holiday
DIY Scalloped Terra Cotta Flower Pot for Indoor Plants
DIY & crafts
Joyful Little Crepe Paper Radishes
diy & crafts
The Most Fun Book Themed Christmas Tree: Nancy Drew Edition
Lifestyle


as seen in


Artist. Designer. Creative Adventurer.
We are called to a life of creativity, and I’m trying to show up for that every day. When I’m not designing website templates or illustrations, I’m getting my glitter shoes metaphorically muddy with my own artistic pursuits. I’m a maker, a quilter, a Christmas enthusiast, a baker, and a truly abysmal (but passionate) gardener.
Hi, I'm Emily.


